There's always a real sense of excitement in the office when our colleague Amy brings in some of her amazing sourdough bread for us all to share, as well as a fair bit of jostling around the table over the bread knife and the butter. The loaf can often be gone in under ten minutes, with just the amazing smell of fresh baking and some happy tummies as all the evidence left to show for it!
Amy, daughter of our founder Barry, has been baking bread seriously for about 18 months now, after a present of a breadmaking day. She now churns out beautiful loaves with ease and generously makes them for family weddings and for friends who beg for just one more loaf as they are so very yummy! Sourdough is made with fermented dough, so it's good for your gut, and needs no yeast to make. If you want to perfect the art of breadmaking yourself then why not give the recipe a try?
To make your starter see here
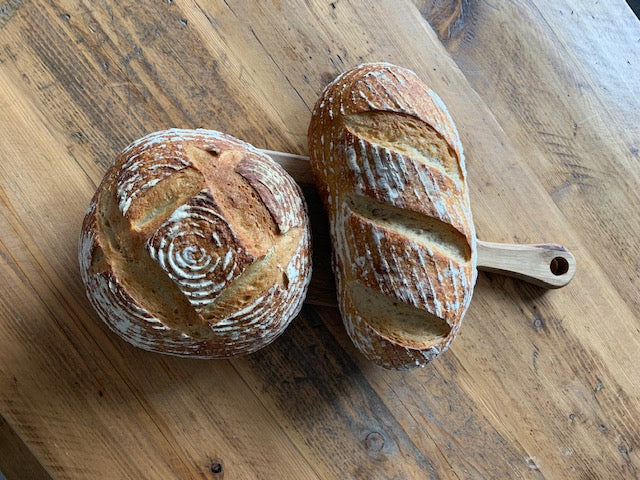
Makes 2 Sourdough Loaves
Prep day: 6.5 hours
Baking day: 40 min
Ingredients:
200g Excited starter
620g Room temp water
900g Strong white bread flour
16g Salt
Equipment (nonessential but all handy):
Dough scraper
Water spray bottle
Plastic hairnets
Method:
In a large bowl mix the starter with the water to make a brown sloppy soup! Add the flour and salt and mix so all incorporated. Leave for 30 mins (it will not look smooth at this stage – will look a bit of a mess!)
After 30 mins:
Spray the top of the dough and the work surface with water. Scrape out of the bowl wet dough side down onto the surface. Stretch and fold the dough outside to inside 10-12 times. Return the dough to the bowl, spray the top with the water and cover with a tea towel. Leave for 2 hours (the dough will be starting to look smoother)
After 2 hours:
Repeat the above step. Return the dough to the bowl for another 2 hours.
After 2 more hours:
Repeat the above step. Return the dough to the bowl for another 1 hour.
After 1 more hour:
Pre-shape stage. You now move from water to flour. Dust the surface with flour this time, not water and turn out dough to surface. Half the dough and shape each into a tight ball. Sprinkle the top with flour and cover with a tea towel. Rest on the surface for 1 hour.
After 1 more hour:
Final shape. Flip the dough over on to the floured surface and gently fold in the edges to create a ball or sausage shape depending on the shape of your basket. Dust the basket with semolina or wholemeal flour and place in the dough upside down and leave to rest. I put a plastic hairnet over mine to stop a crust forming. Put in fridge.
Final rest:
Leave to rest overnight for baking the next morning. NB. You can leave in the fridge for 2 or 3 nights before baking if you wish.
Bake:
Pre-heat the oven to 230°C with a baking stone on the middle shelf and boil the kettle. Remove the loaves from the fridge and turn onto a floured peel. If you don’t have a peel, you could use parchment paper on a tray. Make a cut in the top of the bread to allow the bread to grow in the oven and slide straight onto the baking stone. Quickly pour some boiling water from the kettle into the tray at the bottom of the oven – this creates steam and ultimately a lovely crust. Bake for 15 mins at 230°C and then reduce the oven to 180°C and bake for a further 20 mins.
Voila!
